Seamless Floors: Replace Broken Ceramic Tiles and Refresh Grout Like a Pro

Today we explore replacing broken ceramic tiles and regrouting for a seamless floor that looks freshly installed and survives daily traffic. You will learn how to assess damage accurately, remove shards without harming neighboring pieces, set perfectly aligned replacements, and renew grout so the color blends convincingly. We will highlight essential tools, safety, timing windows, and small professional habits that deliver big results. Expect friendly guidance, realistic checklists, and encouragement to share progress. Ask questions, subscribe for downloadable templates, and join people who value durable beauty underfoot.

Assess, Plan, and Prepare

Successful repairs begin with clarity and patience. Map cracks, listen for hollow sounds, and check grout for crumbling or staining that hints at movement or moisture. Confirm substrate stability, note existing expansion gaps, and photograph patterns so replacements align perfectly later. Assemble respirators, eye protection, knee pads, spacers, trowels, and a vacuum. Schedule work around mortar and grout cure windows to avoid rushed steps that compromise bond strength. By planning disposal, staging cut stations, and protecting adjacent finishes, you reduce risk and stress while boosting precision, safety, and confidence.

Safe Removal Without Collateral Damage

Controlled demolition preserves neighboring tiles and your patience. Start by scoring grout lines to isolate the damaged piece, then relieve stress at the center to avoid prying against delicate edges. Wear eye protection and cut‑proof gloves; shards are brutally sharp. Keep vacuum suction nearby to capture dust and maintain visibility. Slow, steady pressure beats brute force every time. The goal is clean removal with zero chips and a ready, sound surface for fresh setting that will last.

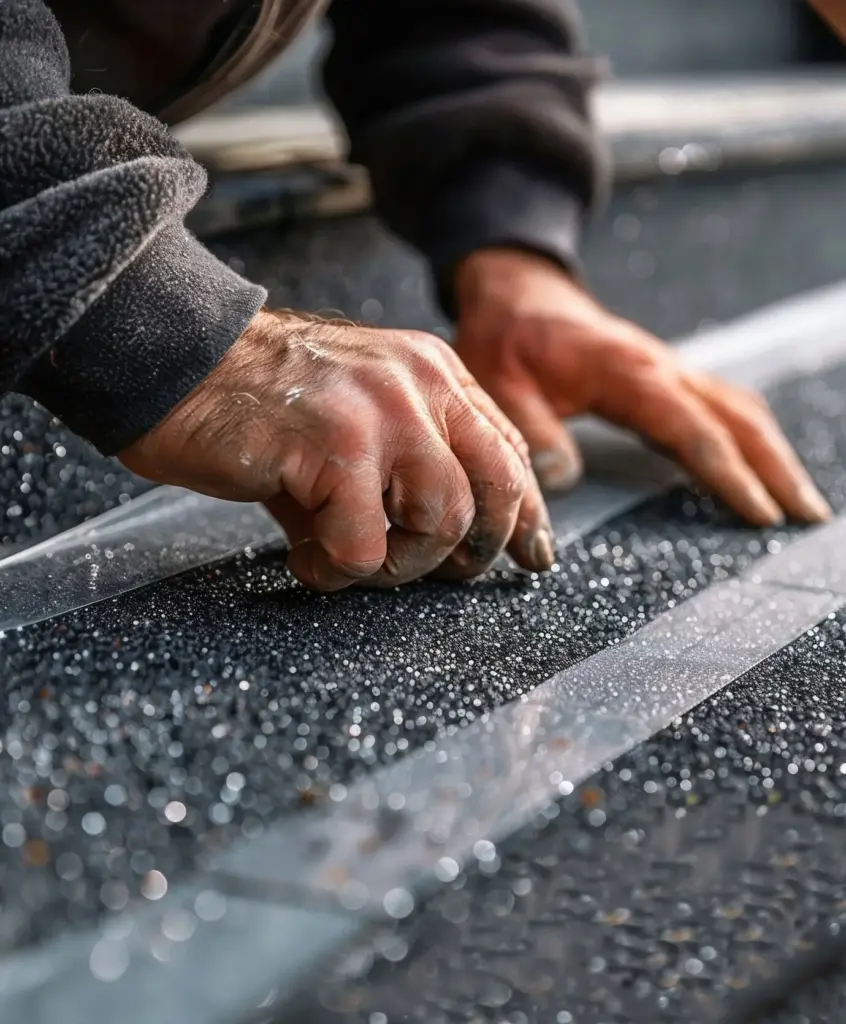
Isolate and Score the Grout

Run an oscillating tool along joints to cut grout and sever mechanical bonds that tie neighbors together. Widen slightly where needed to accept protection shims. Use painter’s tape on adjacent tile edges to reduce scuffing and tame micro‑vibrations. Deepen cuts carefully at corners, because that is where cracks love to travel. Patient isolation prevents heartbreak later and saves finish surfaces from accidental nicks and unintended fractures.

Lift the Tile in Controlled Pieces

Drill a relief hole or score an X to weaken the tile center, then chisel inward, breaking it into manageable fragments under control. Work from the center outward, never levering against a good neighbor. Sweep shards as you go, use knee protection, and pause frequently to reassess your approach. The calm, methodical pace protects your hands, finishes, and sanity, even when surprises appear.

Clean the Bed and Check the Substrate

Scrape thinset ridges flat, vacuum dust thoroughly, and test for bonded residue with the chisel edge. If the bed delaminated, identify why: moisture, movement, or incompatible mortar. Fill low spots with patch compound, sand high edges, and dry‑fit the new tile thoughtfully. A uniform, clean base ensures full support, proper coverage, and long‑term durability under everyday foot traffic and rolling loads.

Set New Tiles with Precision

Replacement success depends on bond quality, plane, and alignment. Choose a tile that matches size, caliber, and thickness, then confirm pattern orientation and grout joint rhythm. Mix mortar to the manufacturer’s ratios, respecting slake and open time. Back‑butter for coverage, comb consistent ridges, and press with slight motion for transfer. Use spacers sparingly, check lippage across edges, and clean squeeze‑out immediately before it hardens.

Grout Like It Was Always There

Grout color and texture determine whether your repair blends quietly or blares loudly. Choose sanded, unsanded, or epoxy based on joint width, tile surface sensitivity, and traffic. Mock up a sample board to compare dried colors under room lighting over time. Pack joints firmly, shape consistently, and clean methodically to avoid haze. The result should whisper continuity and confidence.

Choose the Right Grout and Color‑Match

Measure joint width accurately; under one‑eighth inch favors unsanded, wider joints typically take sanded, while epoxy resists stains in kitchens and entries. Match manufacturer and color family when possible, but confirm with dried samples after full cure. Remember sealers and lighting shift appearance. If needed, tint subtly with colorant later for seamless harmony across old and new lines.

Pack, Shape, and Tool Joints

Hold the float at forty‑five degrees, press grout diagonally to fill fully, then skim off excess with the float nearly upright to avoid hollowing. After initial set, shape lines with a barely damp sponge using light, consistent strokes. Avoid over‑washing; it weakens color density. Keep buckets fresh and rags clean to prevent dragging silt back over finished surfaces.

Seal, Caulk, and Protect

Sealing protects porous grout from stains and eases cleaning routines, while flexible caulk guards perimeters and transitions from movement‑induced cracking. Choose products compatible with your grout type, room conditions, and anticipated traffic. Apply in thin, even coats, allow proper dwell, and test water beading afterward. Respect cure timelines before moving furniture or mopping to preserve your hard‑won finish and color consistency.

Choose and Apply a Reliable Sealer

Select a penetrating sealer for cementitious grout or the manufacturer’s recommended product for epoxy systems. Ventilate the area, mask edges, and apply with a small applicator bottle or brush for control. Wipe excess promptly from tile surfaces. After curing, test repellency with droplets and track maintenance dates. Reapply as conditions dictate, especially in busy, spill‑prone rooms.

Use Flexible Caulk Where Movement Lives

Perimeters, tub edges, and doorway transitions deserve color‑matched silicone or acrylic‑silicone caulk, not rigid grout. Clean and dry the joint thoroughly, insert backer rod where gaps are large, and tool a smooth bead without voids. This flexible line absorbs seasonal shifts, stops echo cracks, and preserves the crisp look you carefully established during setting and grouting.

Respect Cure Times and Reintroduce Traffic

Mortar and grout gain strength over days, not minutes, so patience pays dividends. Block foot traffic, avoid steam cleaning, and keep rolling loads away until manufacturer timelines pass completely. Use temporary boards if access is unavoidable. Reinstall furniture gently with felt pads and avoid saturating water for several days. This discipline protects adhesion and color.

Troubleshoot and Maintain for the Long Haul

Even careful installations face real‑world stresses from temperature changes, heavy appliances, and tracked‑in grit. Learn to spot early warning signs—hairline cracks, darkened grout, or hollow sounds—and intervene quickly before problems multiply. Establish gentle cleaning routines, avoid harsh acids, and refresh sealer on schedule. When challenges exceed tools or time, trustworthy professionals provide diagnostics and warranties. Share wins and questions below.

Fix Common Issues Before They Spread

If a joint cracks, cut it out cleanly and regrout or caulk depending on location and expected movement. Address leaks immediately, dry the area thoroughly, and correct sources of flex such as loose underlayment or joist deflection. For recurring hollow spots, evaluate uncoupling membranes and expansion planning. Swift responses prevent localized issues from ballooning into costly failures.

Clean, Refresh, and Preserve Appearance

Vacuum grit that scratches glazes, mop with a neutral cleaner, and banish gray film by changing water often and wringing thoroughly. For stubborn discoloration, use manufacturer‑approved cleaners and soft pads, never steel wool. Top up sealer before it fully wears. Simple, steady care keeps joints tight, tones consistent, and the floor quietly beautiful year after year.
Sarahandyshak
Privacy Overview

This website uses cookies so that we can provide you with the best user experience possible. Cookie information is stored in your browser and performs functions such as recognising you when you return to our website and helping our team to understand which sections of the website you find most interesting and useful.